Get the loot !
God of War is full of difficult puzzles for players to complete , with the most perplexing among them beingNornir Chests . These chests can sometimes require players to perform fastness trial , figure out complex puzzles , or just hunt down the headstone to open them . TheNornir Chest on Alberich Islandcan be especially difficult to complete due to its strenuous time demarcation .
All Bell locations for the Alberich Island Nornir Chest in God of War Ragnarok
Bell #1
The first Bell is the easiest to spot , as it is locateddirectly above the chest . The mystifier is deceptively simple at this breaker point , but do n’t occupy , it develop more complicated .
Related : How to get the reddened chest behind the gate in the Lower Wildwoods in God of War Ragnarok
Bell #2
you’re able to find the second Bell by turning around when facing the first Bell and looking slightly to the right hand . The Bell itself is blocked behind a metal grate . Players can get at the key by throw away Kratos ' Leviathan Axe at the wooden panel pictured above . This will make the Bell to rise , set aside players to hit it apace before descend back to its original location .
Bell #3
The third Bell will also require some extra steps . Like the 2nd Bell , this one is locate behind a alloy grating . This time , players demand to have Atreus shoot the soundstone shown in the pic above , causing the Bell to lower a bite , kick in player a clear jibe .
How to open the Nornir Chest on Alberich Island in God of War Ragnarok
This teaser is clock , so there is an ideal scheme for the whole thing . player should start with Bell # 2 since it necessitate the most drive and density to hit , moving to Bell # 3 , and finally onto Bell # 1 . If players discharge the puzzle in this ordering , they should find success after a few endeavour at most .
Alberich Island walkthrough in God of War Ragnarok - Svartalfheim
Where to find Odin’s Ravens on Alberich Island
Odin’s Raven #1
It will take quite a few steps to hand the first of Odin ’s Ravens on Alberich Island . Before heading there , make certain to have first completed theForging Destinymain story quest , which unlocks a necessary weapon called theDraupnir Spear . With this tool in hand , walk up to the location show in the image above and urge on theL2 Buttonto aim andR1 Buttonto found it at the wall .
The Spear will stay put there , allowing Kratos to jump up to the platform above . Look out for a wall of Soundstone ( green metal rocks ) , and utilize transonic arrow to reveal the Raven flying nearby .
Odin’s Raven #2
From the first Raven in this area , cover along the path and destroy the rock ‘n’ roll in the image above along the water present in the image above to lift a grapple period top to a wooden program . Head across another gap with a grapple point and jump up one political program to find a kettle of fish with the Raven sitting at bottom .
Where to find the Legendary Chest on Alberich Island
To recover the Legendary Chest on Alberich Island , follow the steps to accomplish Odin ’s Ravens in this area . From the Second Raven , take the air around the street corner to the right and destroy another stone with the Draupnir Spear to reveal a cog . Tug on the chain pulley nearby to lower a cage underneath the waterwheel .
With the strand still in hand , shed the Leviathan Axe at the sprocket to freeze out it in place . Hop over to the wooden platform in front of the waterwheel . Use Freya ’s Sigil Arrows on the cog by pressing the Square Button , and return the Leviathan Axe to Kratos ' mitt . project the Leviathan Axe at the weewee spout , which will lower a grapple point leading to an lift and take players straight to the Legendary Chest .
Interested in other helpful God of War Ragnarok guides and want to take more ? crack outShould you pick the Dauntless Shield or Stone Wall Shield in God of War Ragnarokon Pro Game Guides !
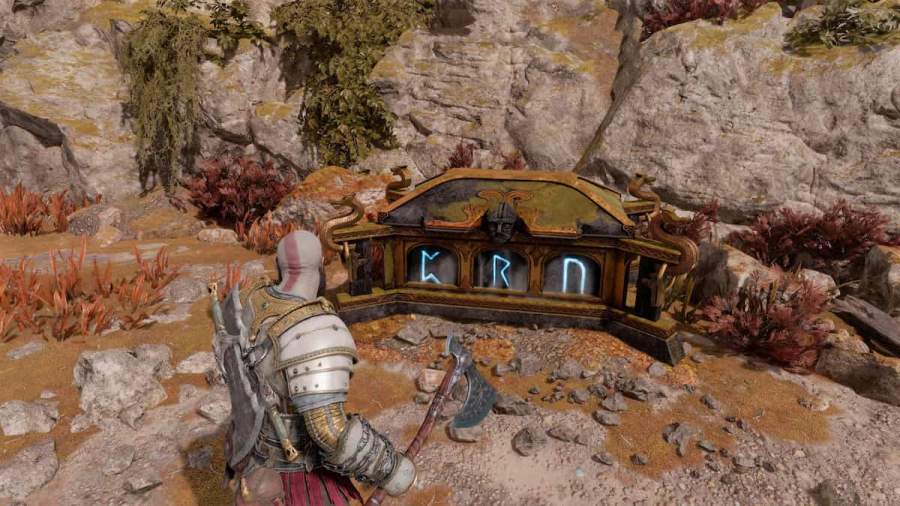
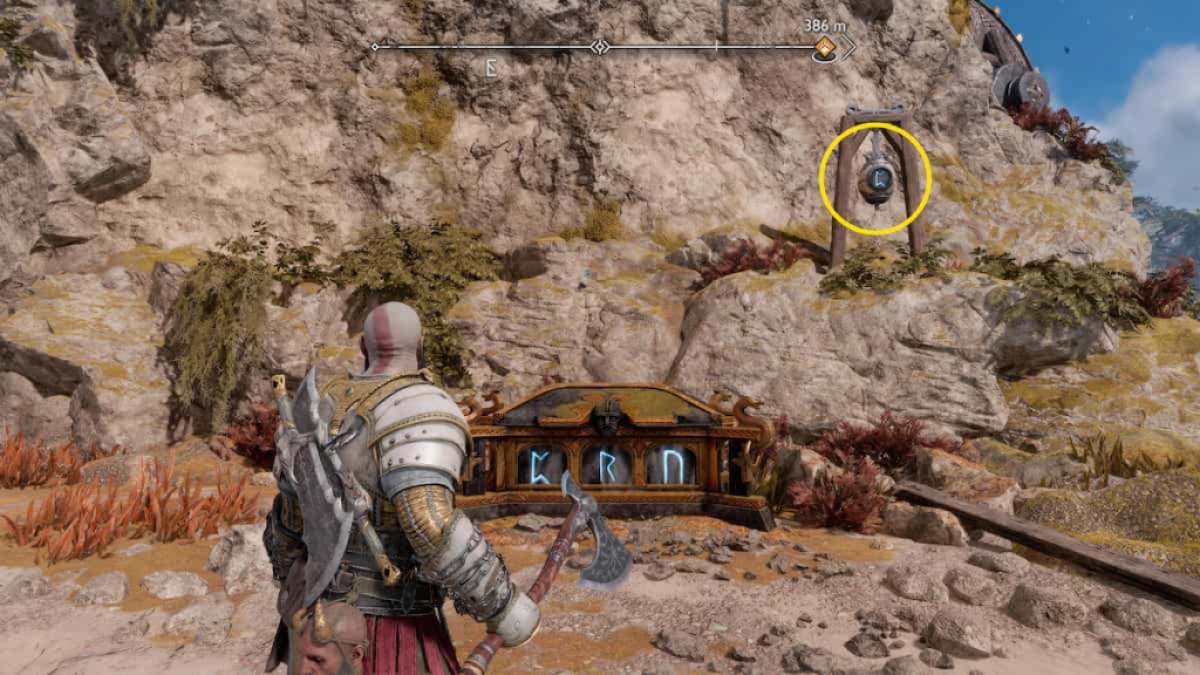
Image by Pro Game Guides
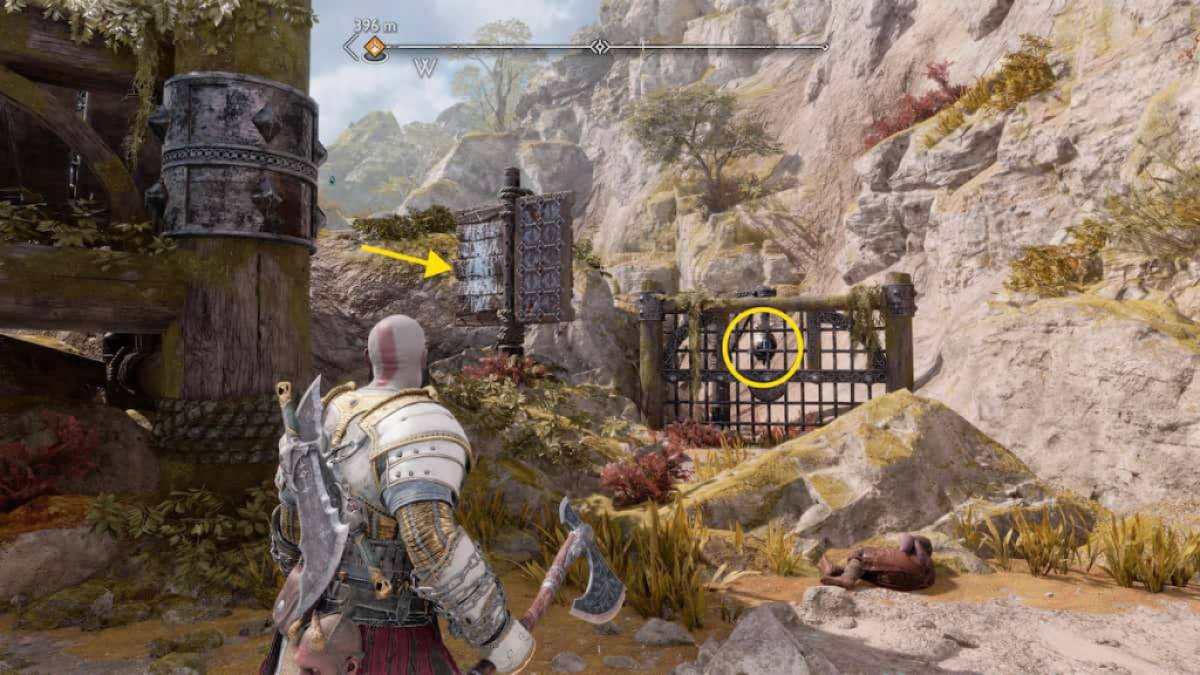
Image by Pro Game Guides
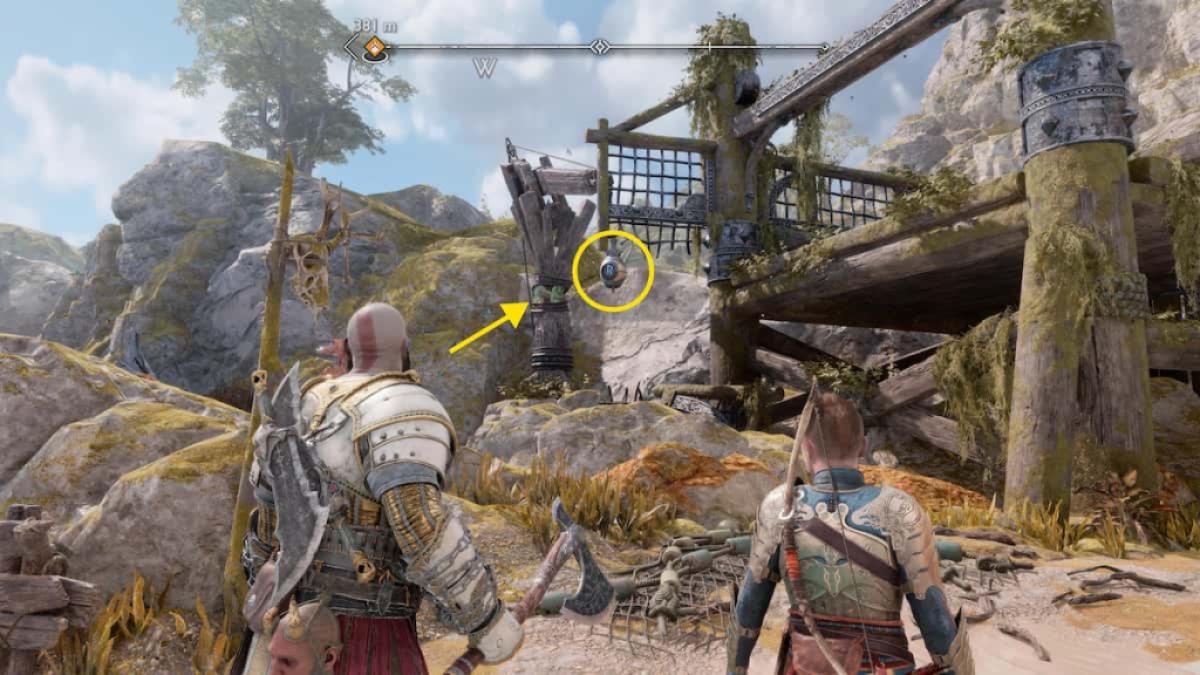
Image by Pro Game Guides
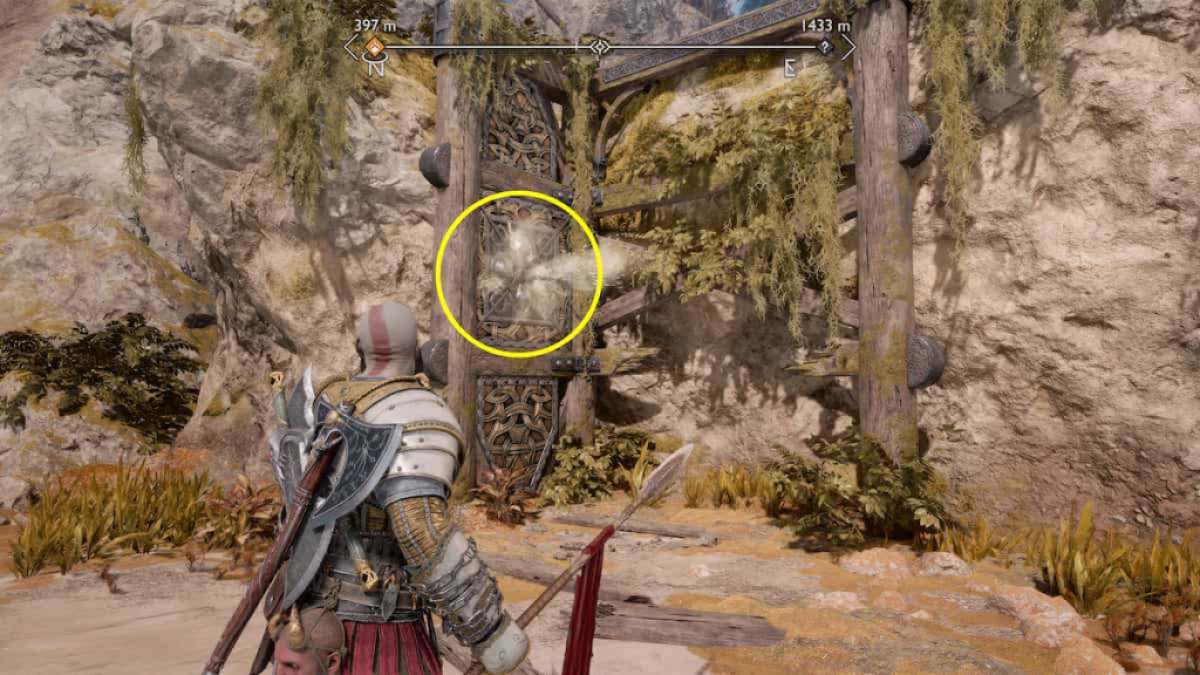
Image by Pro Game Guides
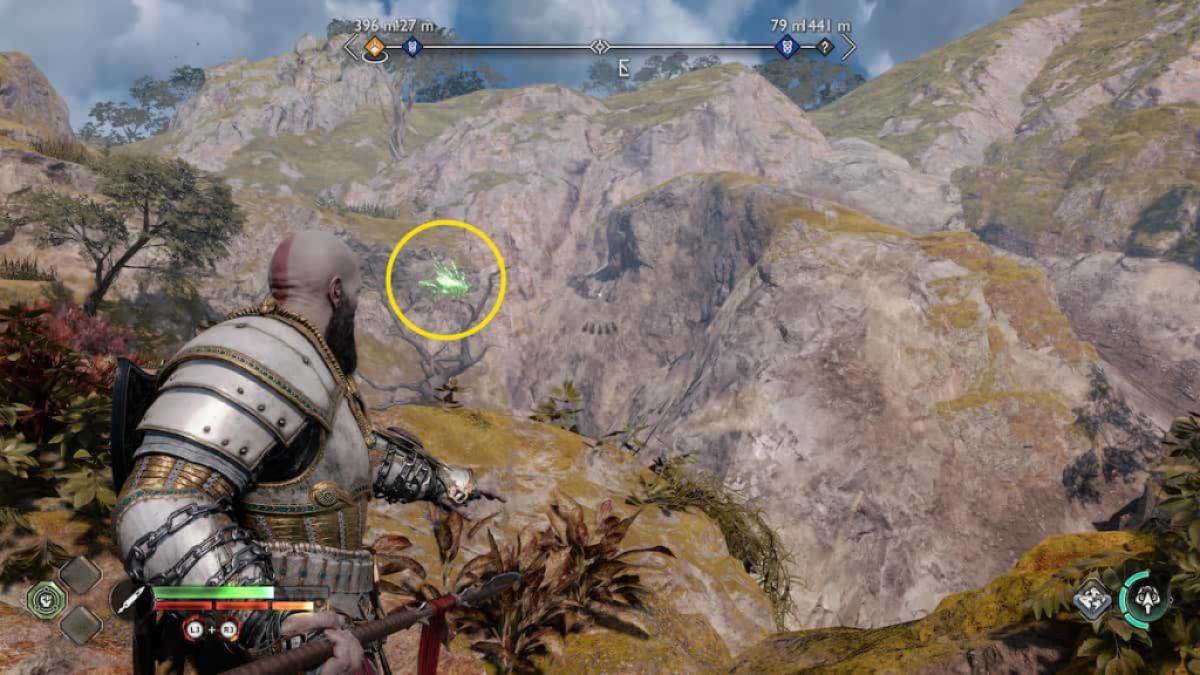
Image by Pro Game Guides
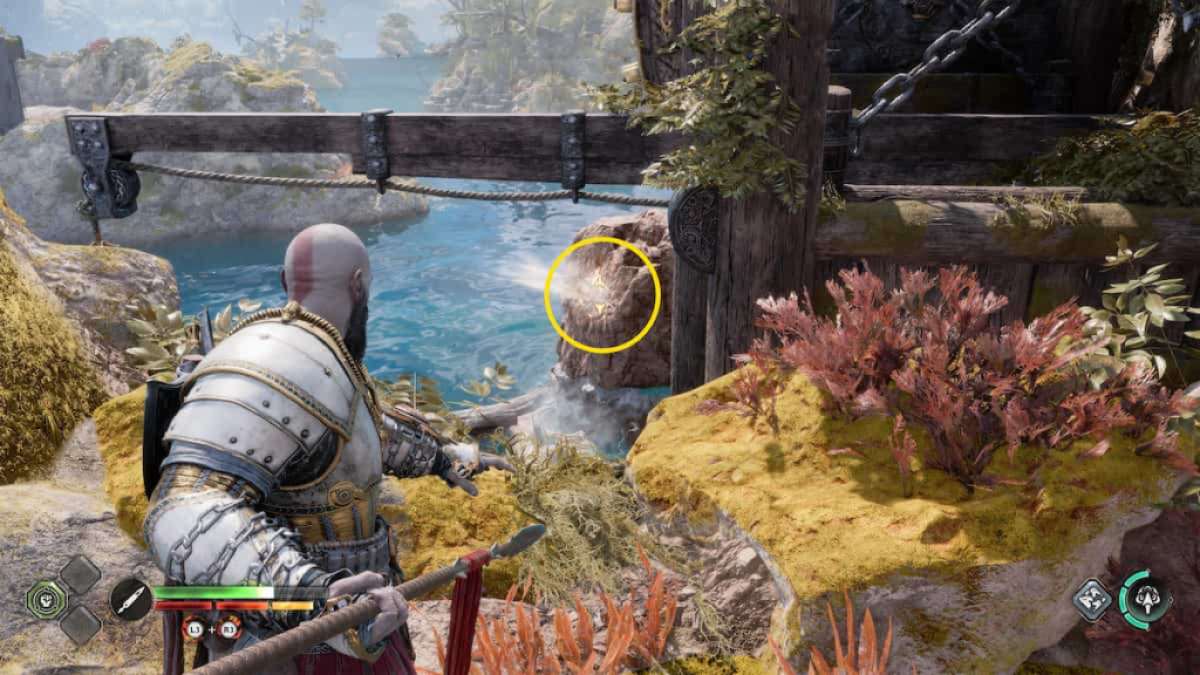
Image by Pro Game Guides
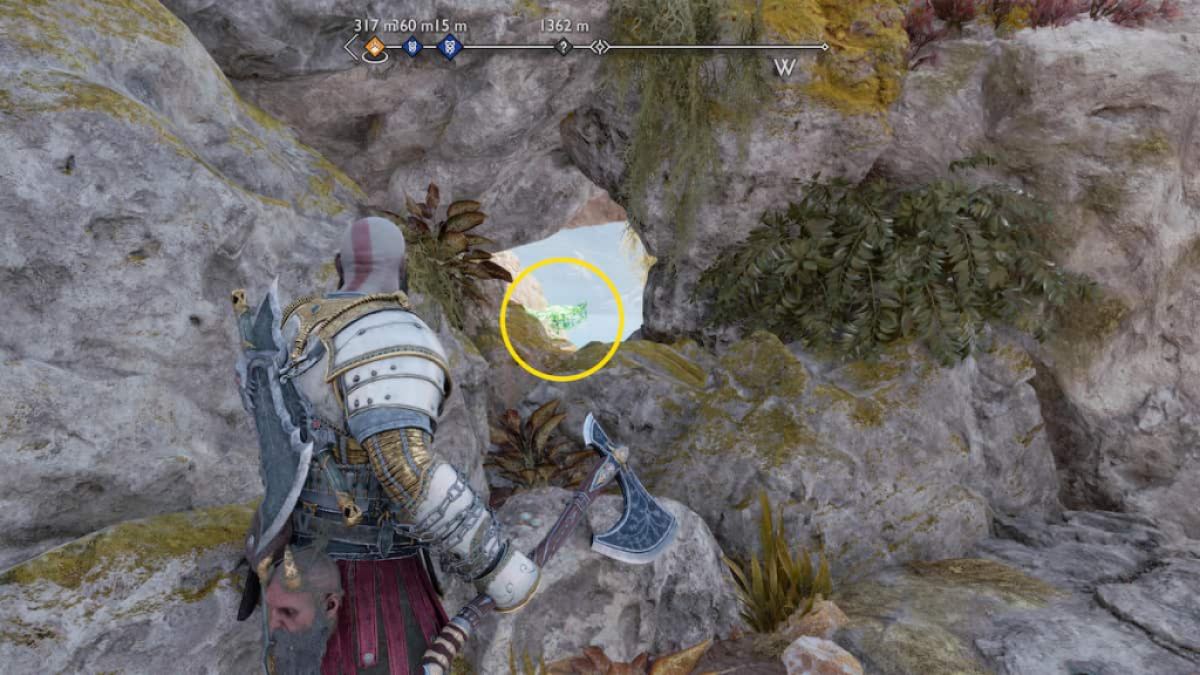
Image by Pro Game Guides
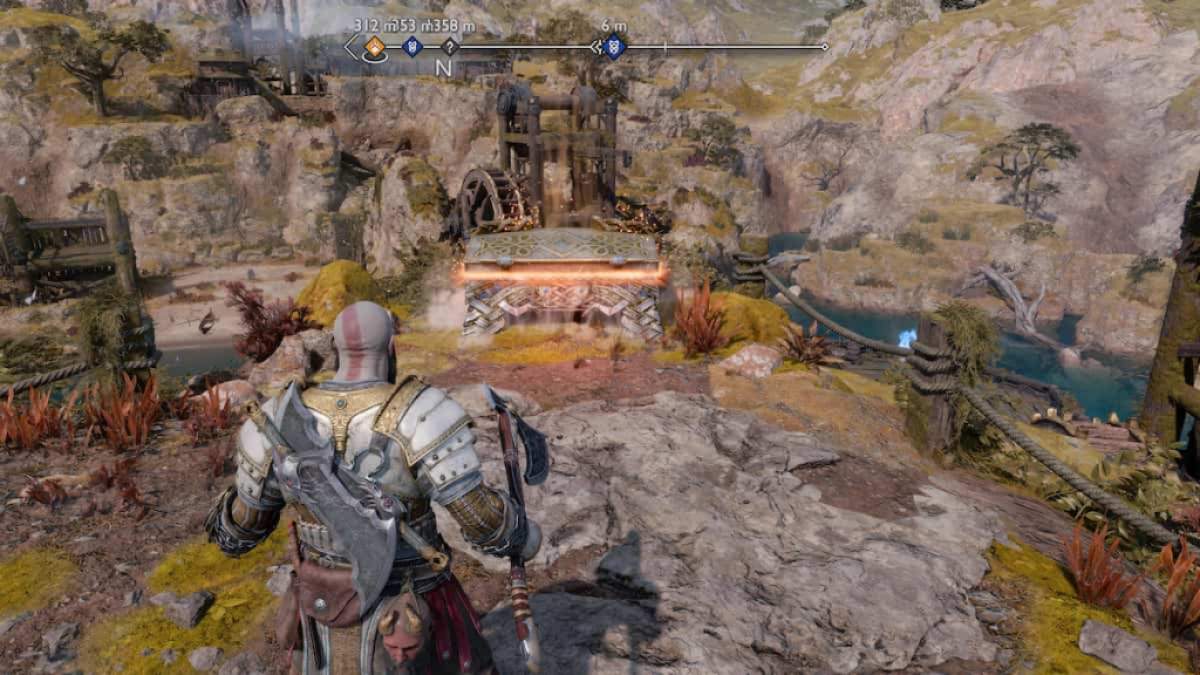
Image by Pro Game Guides
