The labyrinth is getting trickier .
The Tears of Themis Blizzardous screw thread of Red event runs fromJanuary 12,2023,to February 2,2023 , and is open to all lawyer who have complete the tenner - Note Main Story 2 - 28 . After completing the event tutorial , you ’ll be capable to explore theVilla Courtyard , which houses a building call in the Bright Pavilion .
Inside the Bright Pavilion , you may explore four rooms to pull together Artifacts , Silk Pouches , and more . The first way is call theNorth Wing . After complete it , you ’ll unlock the slimly more difficult South Wing .

All Bright Pavilion South Wing Scattered Notes, Artifacts, & Silk Pouch locations
In the South Wing , you may get the following collectibles :
This walkthrough will show you an exact course to be . As there are no miniskirt - maps , we recommend follow this guide from start to end to avoid muddiness . But you’re able to call for the items in any order — just make indisputable to exit one Scattered Note for last to not get recoil out of the room prematurely .
Scattered Note #1
Switch to themale hint ’s side . Head east until you reach a deadened death , where you ’ll discover a switch . Interact with the switch to get to the gate and enter . Turn right and keep going until you reach another dead end , where there ’s another switch . Interact with the substitution to open a logic gate on Rosa ’s side .
Next , switch toRosa ’s side . Now that the gate is capable , head northward until you get hold of a utter end . Interact with the switch to open a logic gate on the virile lead ’s side . We ’ll leave behind that open for later .
Next , maneuver west until you reach an Cartesian product . You must go north , where you ’ll immediately spot the Scattered Notes in front of the Candlestick . Do n’t forget to pick them up !

Image by Pro Game Guides
Related : Tears of Themis code
Silk Pouch #1
Next , go left until you reach a deadened end . Head north until you reach another dead end . But you ’ll notice that there ’s a effervescent spot by the vases in front of the bookshelf . Interact with it to get a Silk Pouch .
Scattered Note #2
Next , head all the way down south until you reach a deadened end . become right — after a few steps , you ’ll find a switch . Interact with the transposition to open another logic gate on the male lead ’s side . Park Rosa at the nearby Candlestick to prevent your stamina saloon from deplete .
Now we take to throw back to themale tip ’s side . Since the logic gate has been opened , steer south to find a huge room . Then head to the westernmost part of the elbow room ( dismiss the furniture , they are not dead death ) , where you ’ll find a small quad with Scattered billet on the ground . Pick them up to proceed .
Silk Pouch #2
Next , you need to head back to the large part of the room , so turn right by a few dance step until you ’re in the bread and butter sphere . Then channelise south until you turn over a dead destruction ( you should be stand beside a plant at this spot ) . twist right until you reach another dead goal . But this time , there ’s a switch — interact with it to spread out a gate on Rosa ’s side . We ’ll deal with that later .
Above the electric switch , you ’ll observe a effervescent plant . Interact with it to get the second Silk Pouch .
touch on : Tears of Themis Ink Study exploration & mystifier guide – Blizzardous Threads of Red event

Image by Pro Game Guides
Scattered Note #3
Keep going south until you turn over a dead end . Then turn leave to find Scattered note on the ground . Pick them up , then keep heading go out until you reach a drained end . Interact with the switch to open another gate on Rosa ’s side .
Key - Equinox Silver Coin
Scattered Note #4
The last part is easy — just go all the elbow room down south , where you ’ll find out the last Scattered Notes . beak them up to pass away the South Wing . You ’ll also unlock the next room , theEast Wing .
For more outcome guides , check out ourTears of Themis Stellis Reveries guide – Tiered Pass , advantage , & morehere on Pro Game Guides .
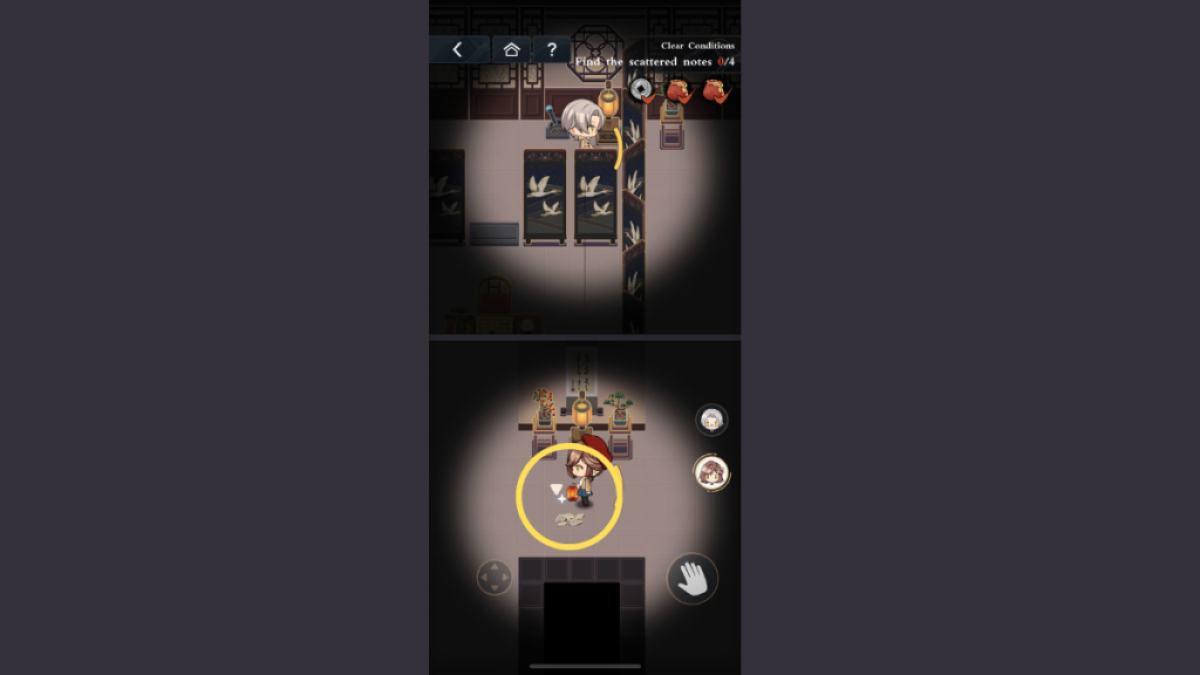
Image by Pro Game Guides
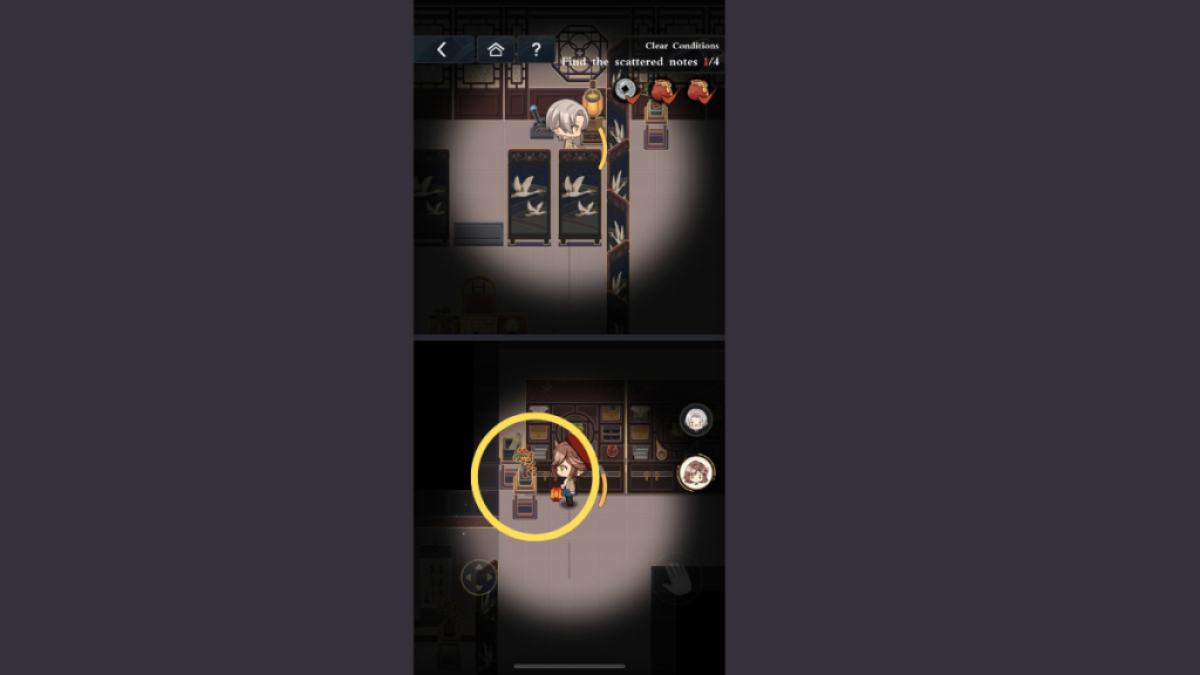
Image by Pro Game Guides

Image by Pro Game Guides

Image by Pro Game Guides
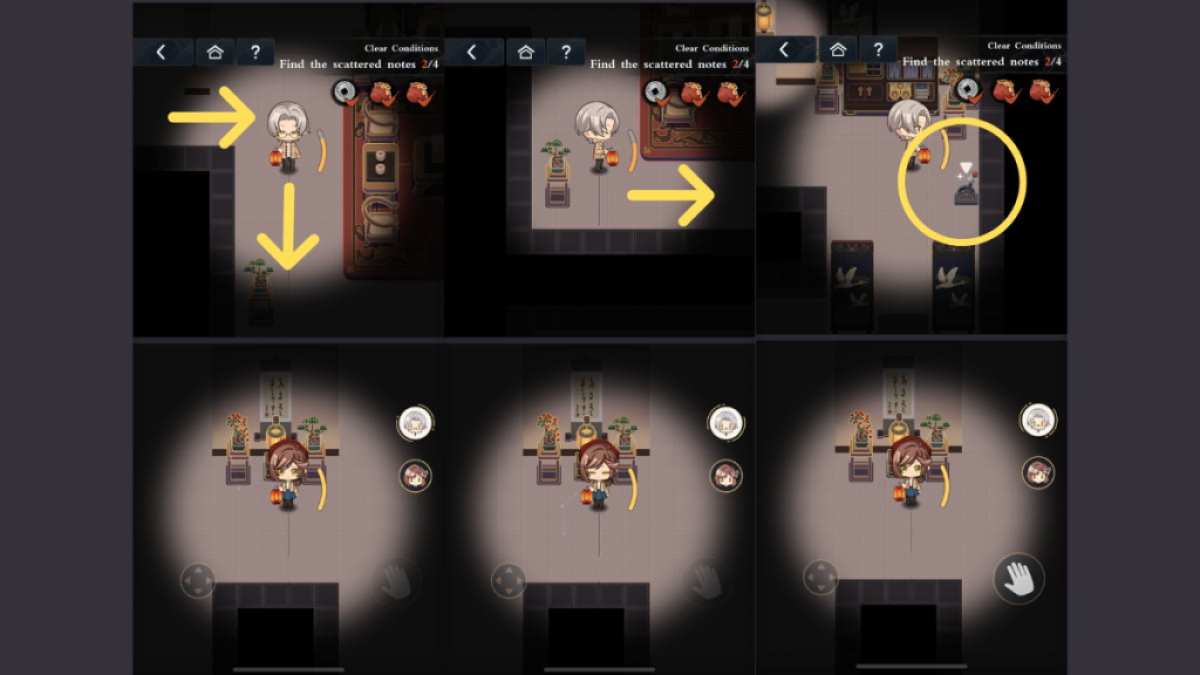
Image by Pro Game Guides
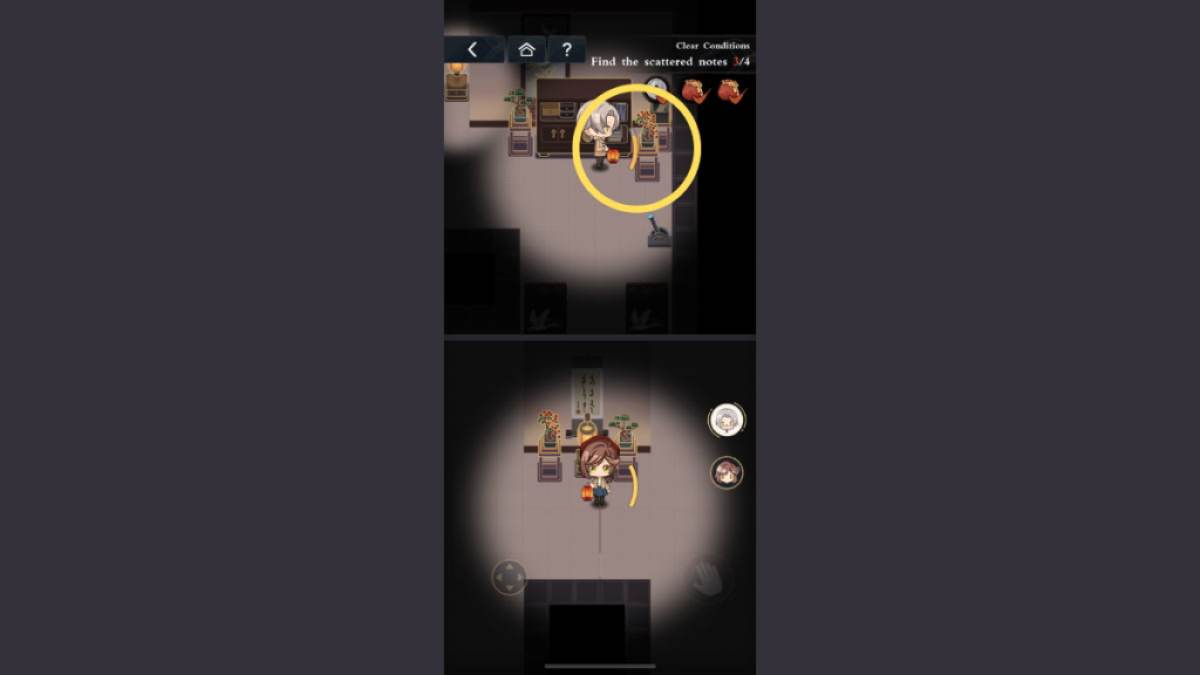
Image by Pro Game Guides
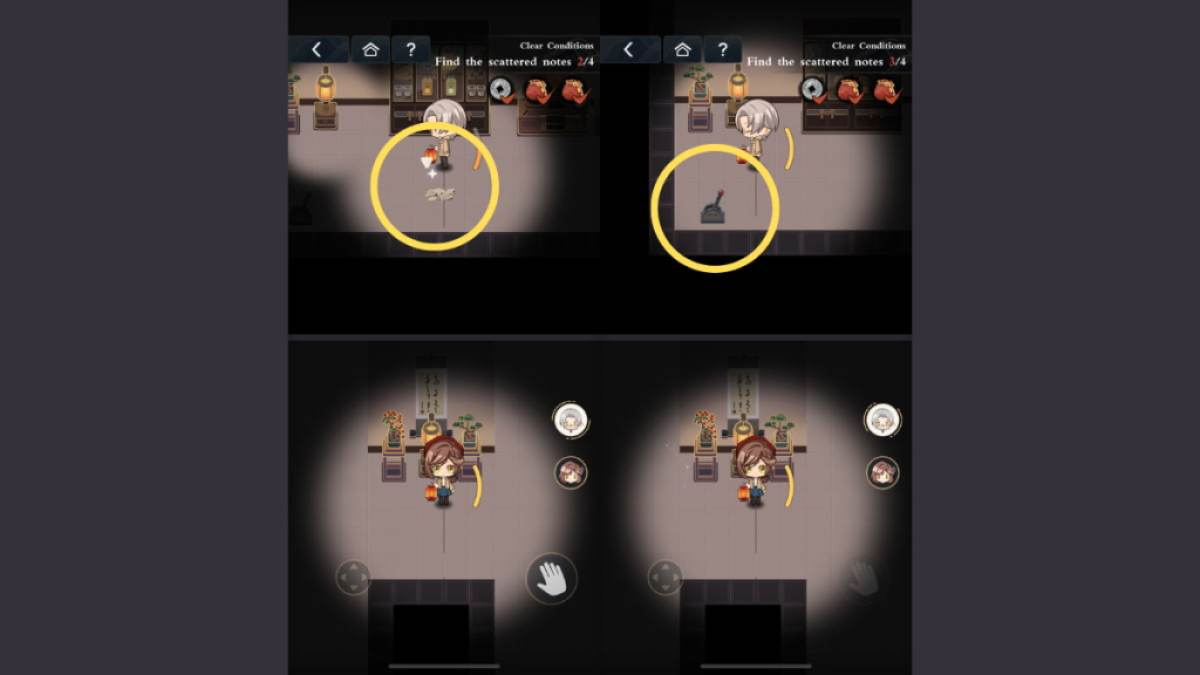
Image by Pro Game Guides
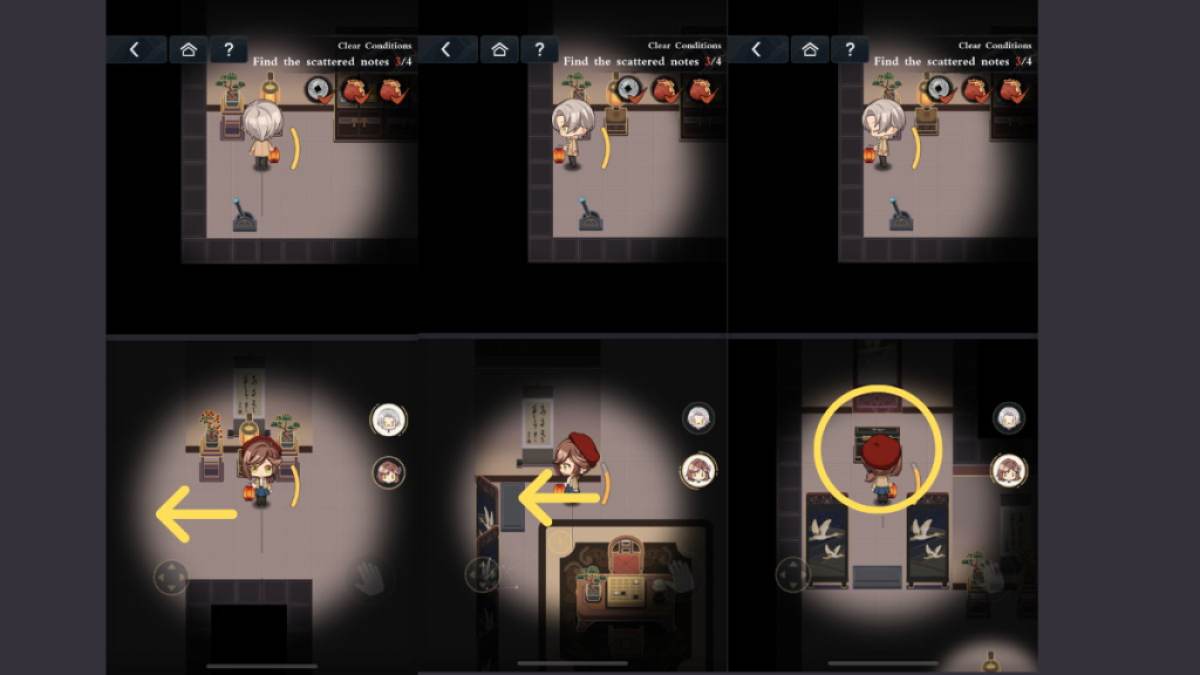
Image by Pro Game Guides

Image by Pro Game Guides
