Wolfgang ’s circumstances was etch into the star .
Thus Was the Work Done in Vain is a limited - metre World Quest that can only be complete during Genshin Impact ’s Summertime Odyssey case , which runs fromJuly 15 , 2022 , to Aug. 24 , 2022 . In this quest , you and Paimon endeavor to change the fate of an explorer name Wolfgang by leaving clue in the past tense in hopes of fanning the fire that motivate him to adventure beyond his limits .
Keep in mind that it ’s potential to complete this World Quest without initiating it . If you ’ve been exploring the Minacious Isle , there ’s a chance you ’ve already done some of these puzzles , but this guide will aid you patch them together so you may follow Wolfgang ’s story and get the final reward .

How to unlock Thus Was the Work Done in Vain World Quest in Genshin Impact
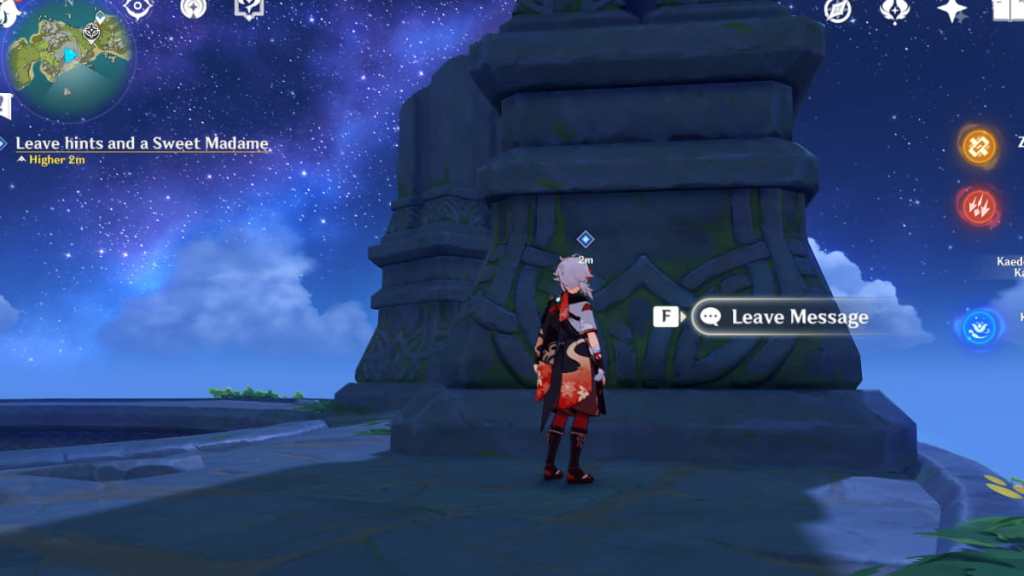
To unlock this World Quest , you first need to complete the Event QuestThe Ancient sky-blue Starsand theStarlight Coalescence configuration puzzlein the Minacious Isle . Consider preparing aSweet Madamein progress , as you need it at the end of the quest .
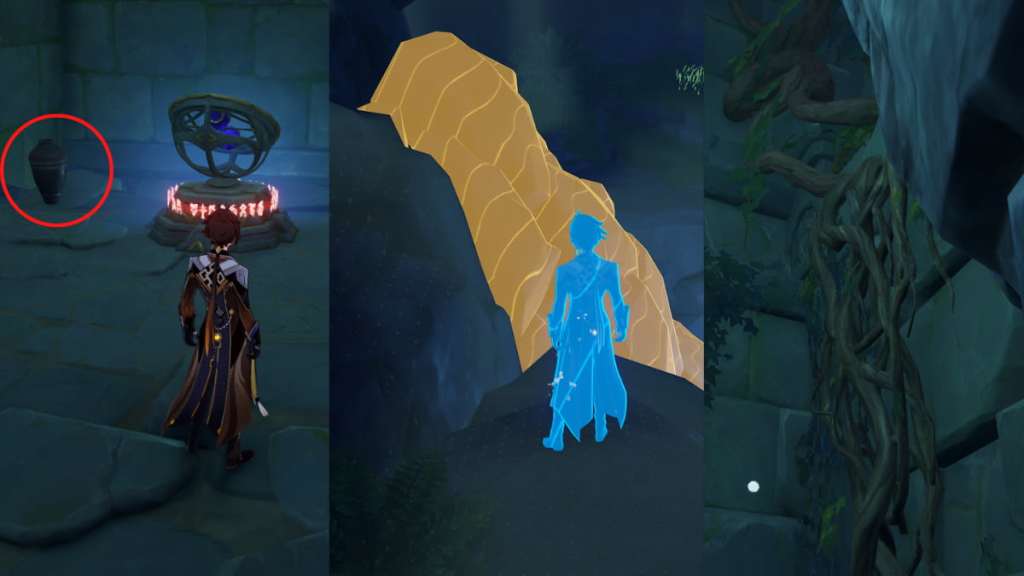
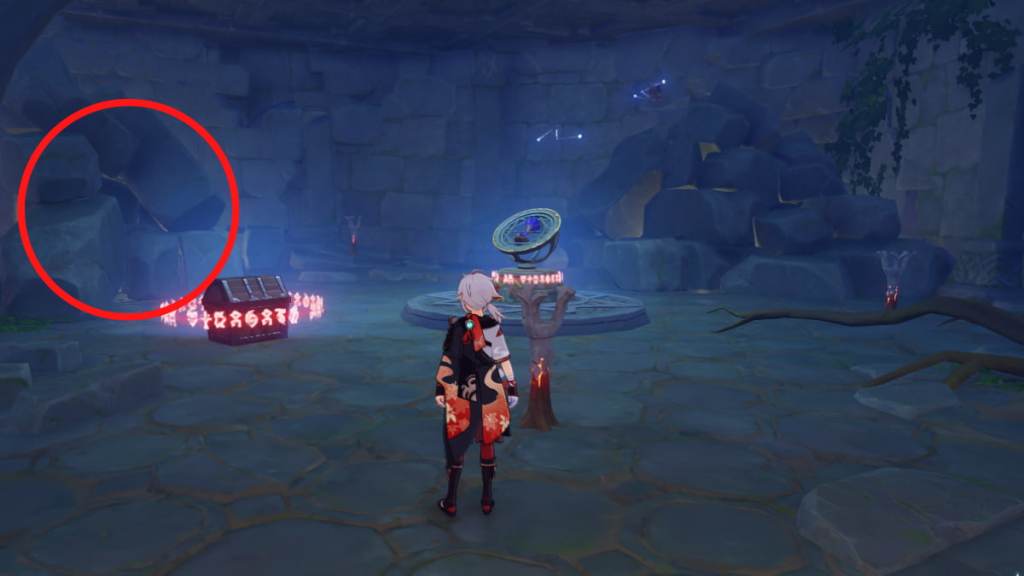
Once you ’re all set , start by usingPlace in Waterto tack to thepresentversion of the Minacious Isle , then head to the sphere circled in the image below . you may get there by turning on the Anemo Monument below to breed a wind instrument current to propel you upward , then glide toward the specified location . You will find an Old Notebook with a depressed exclamation scar — interact with it to induct the World Quest .
How to complete Thus Was the Work Done in Vain World Quest in Genshin Impact - All puzzle solutions, Chest & Starlight Coalescence locations
Check the ruins of the past - Pyro torch puzzle
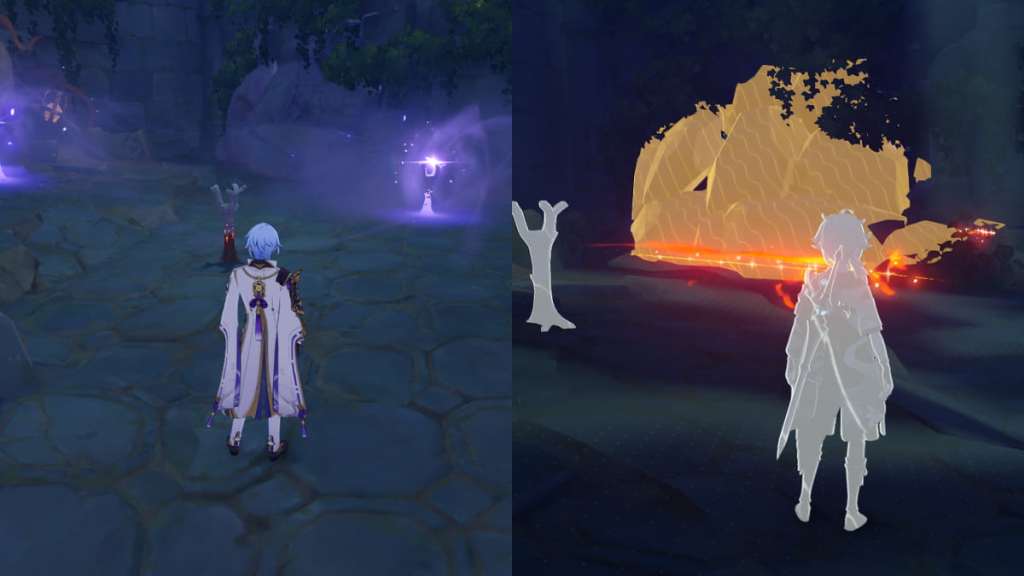
Once that ’s done , succeed the quest marking to the pool of water and utilize the Place in Water lineament to switch to thepastversion of Minacious Isle . You ’ll be right in front of a ruin . Enter it and go down the steps , then enter the chamber with Pyro torches .
Upon entering the chamber , the gate behind you will at once close , trapping you inside . Assuming that the gate isbehindyou , utilise Pyro onto the flashlight fromright to left . Doing so in this precise order will solve the puzzler . Aglowing Investigate spotwill seem — interact with it to leave marks on the wall .
Related : How to figure out the Luxurious Chest Starlight Coalescence puzzle in Genshin Impact

Ruins on the ocean surface
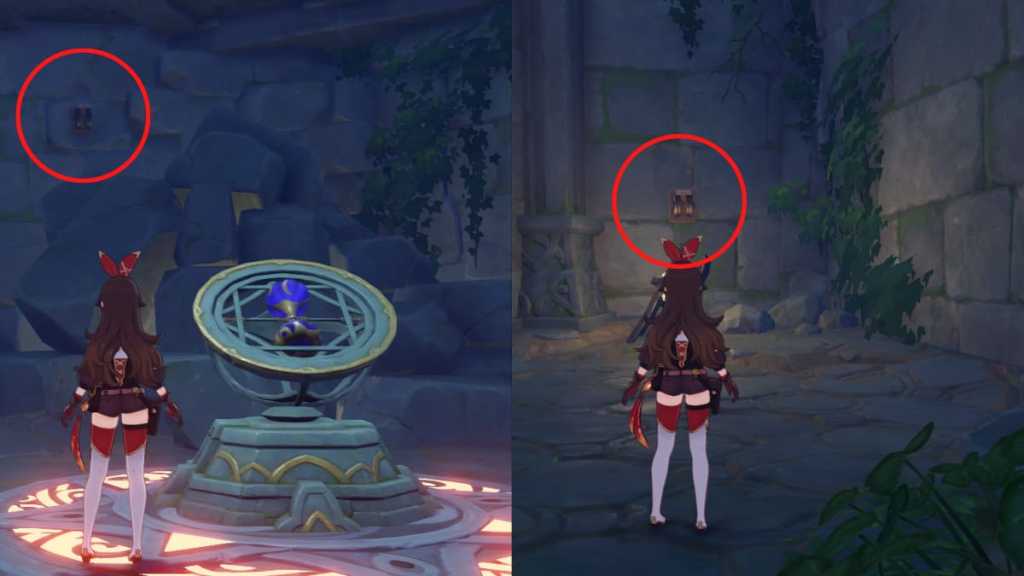
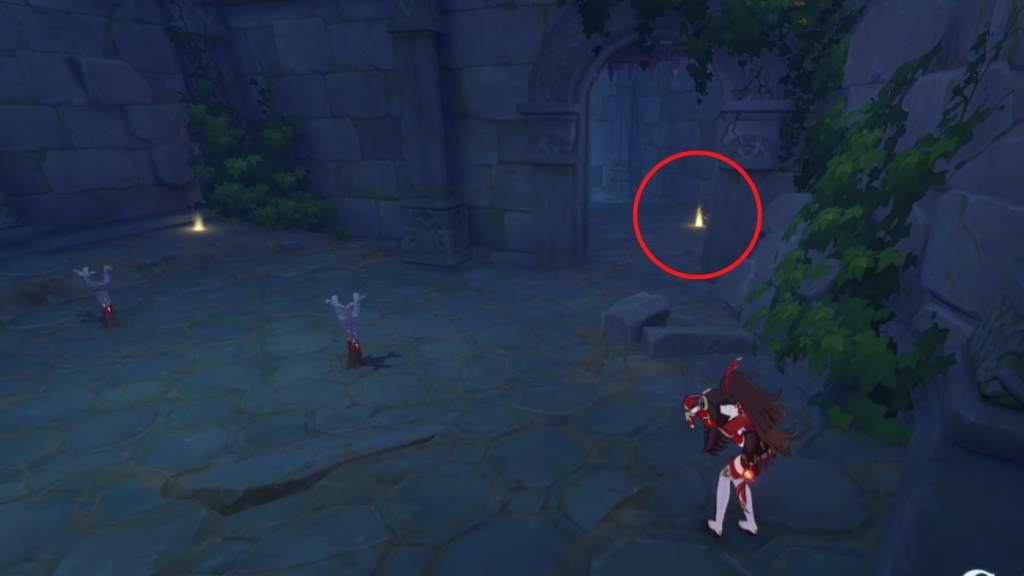
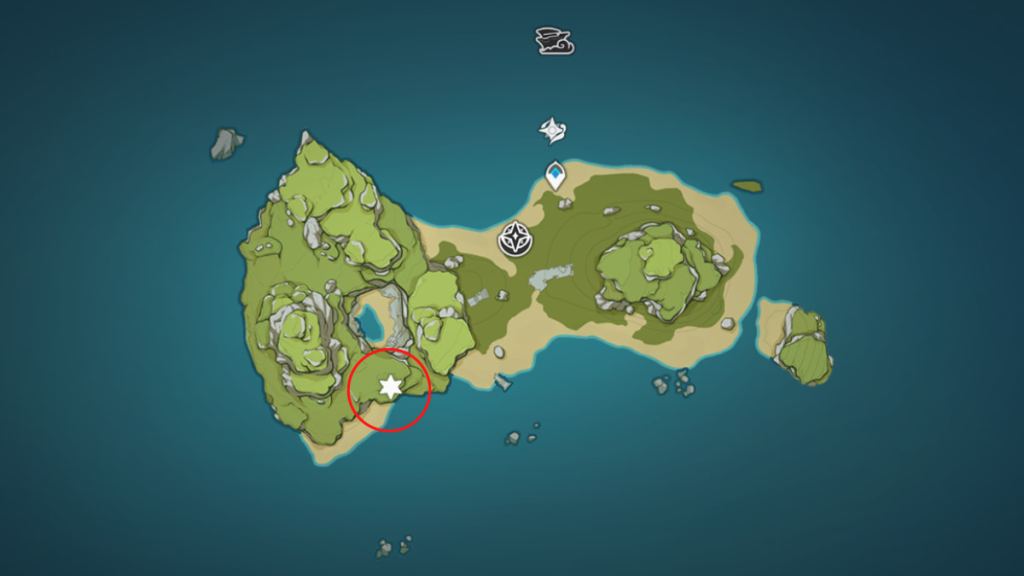
After leaving mark on the bulwark , head back to thepresentMinacious Isle and follow the quest marker to the location of the Old Notebook . Interact with it to begin the next segment of the pursuance . The game will involve you to channelise to the islet west of the Minacious Isle , butno postulate to use the Waverider .
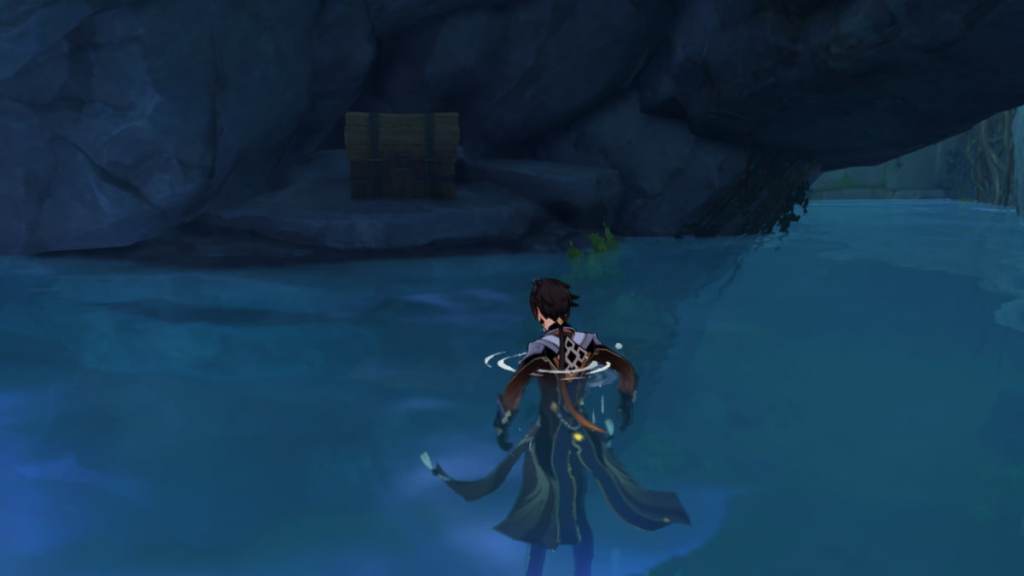
To get there , head to the area circled in the image below to find out a specific puddle of H2O , then use thePlace in Waterinteraction to delight you to the quest locating .
Locked Common Chest puzzle
Jump down to enter a pocket-size elbow room with a locked Common Chest . Your destination is todestroy all six breakable object in the roomwithin a few second . Keep your eyes peeled — there ’s one above the Common Chest and one at the back of the way .
The vessel will keep respawning if you do n’t break them within the time demarcation . Once you ’re done , the Common Chest will unlock for you to plunder . Above the Common Chest , there ’s a hole that you’re able to infix to go further into the ruination .
Water level puzzle (Common Chest reward)
Enter the hole andturn leftto discover a locked mechanics beside a vase . Destroy the vaseusing a Normal Attack . Then jump down and wait for the water tier to drop . After it drops , use Elemental Sight to find thebreakable boulderand ruin it with Geo Damage or a claymore . The water level will rise again . Look for the vines and wax them to find the locked mechanics again .
A Modern vase will engender beside the locked mechanics , sobreakit again . Then jump back down and the H2O story will decrease , and then increase once again . This time , the water system will increase high enough for you to reach theCommon Chestto loot . After looting the Chest , mount the vine and return to the entrance of the cave .
Obtain Sea-Salt Crusted Key
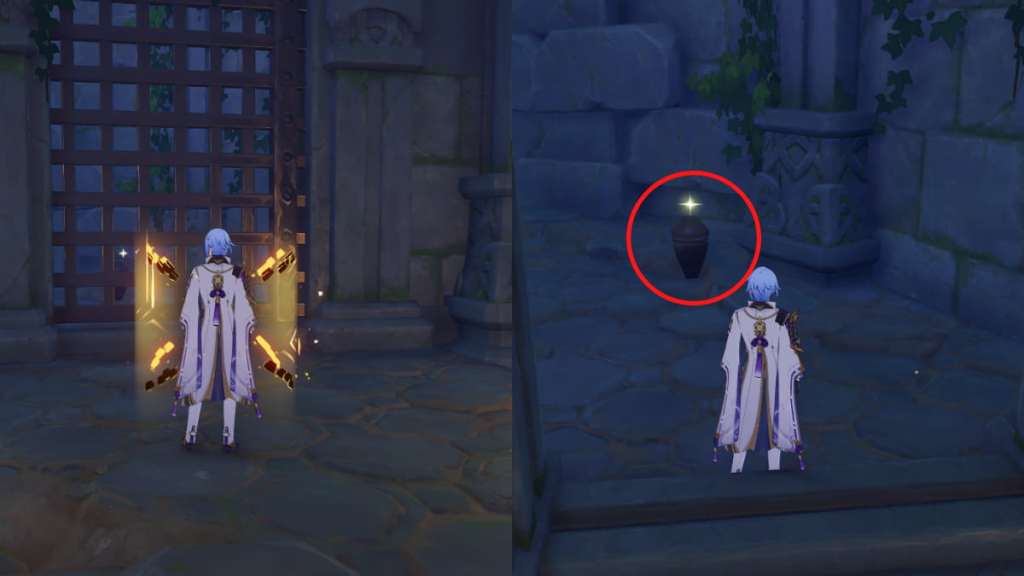
Head back to the entering of the cave ( at the point where you turned left ) , and this time , wrench rightand turn on Elemental Sight to find abreakable boulder . Destroy it using Geo Damage or a claymore mine to open up a path lead further in . As shortly as the path opens up , you will get a glowing spot . Investigateit to get a Quest Item calledSea - Salt Crusted Key .
After looting the key , follow the path further in until you enter a elbow room full of Hilichurls . vote down them all , then interact with theOld Notebookbeside a Pyro torch .
Related : How to change the weather to spawn wind electric current in the Minacious Isle in Genshin Impact – Summertime Odyssey result
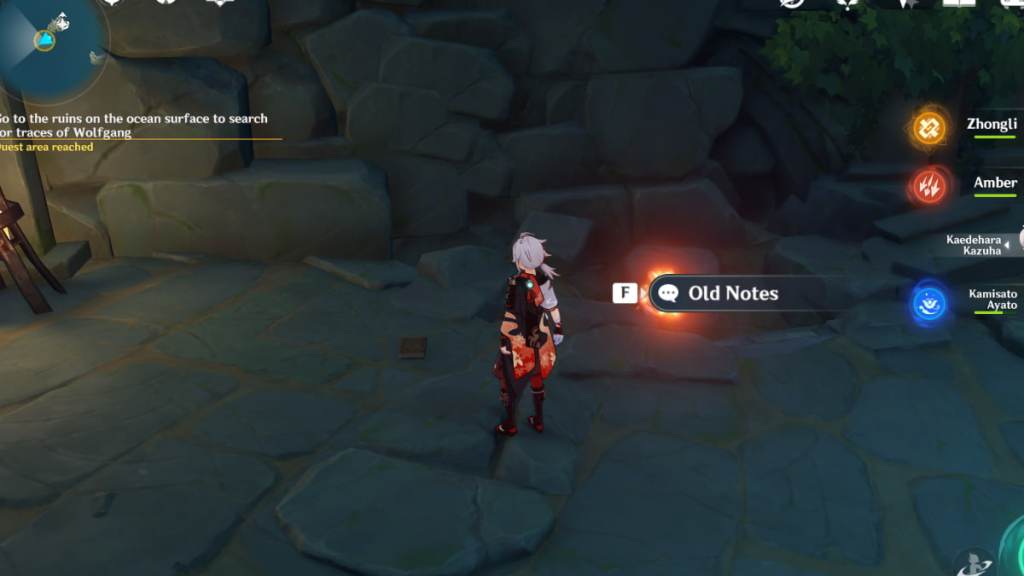
Go to the ruins on the ocean surface
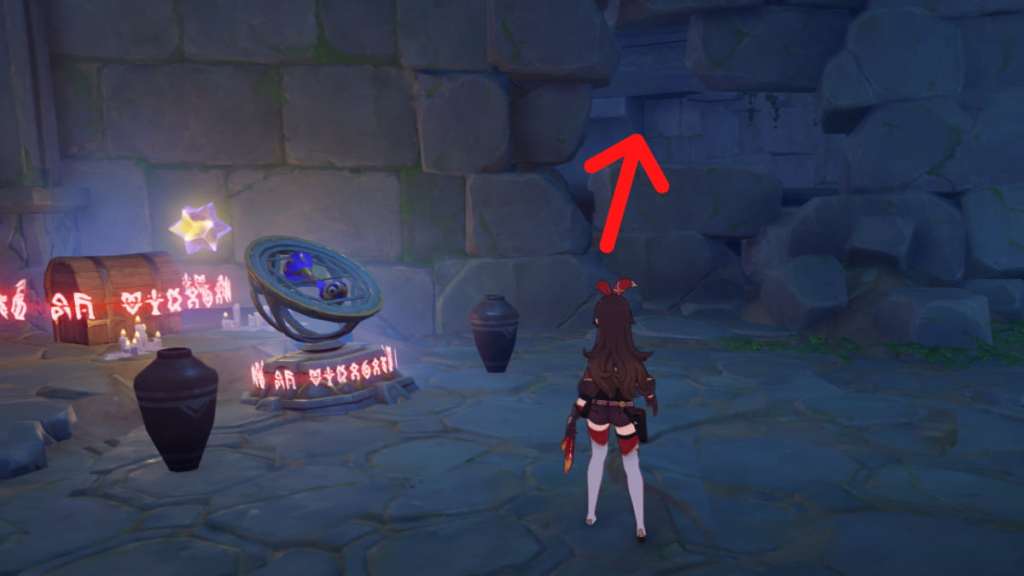
Exit the chamber by retracing your steps all the elbow room back to the first room ( where the Pyro torch puzzle was ) . implement Anemo onto the four - leaf clover to engender awind currentto propel you upward , then interact with thePlace in Waterpool to channelise yourself back to thepastMinacious Isle .
Pyro torch puzzle
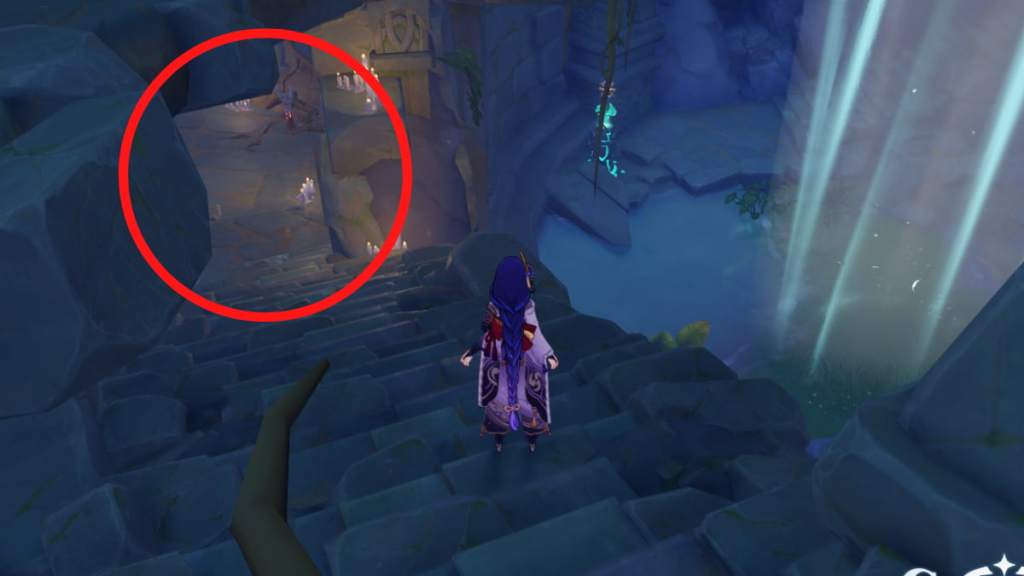
As shortly as you reach the retiring Minacious Isle , lookbehindyou to find an ingress to a cave . Head inwardly to find a locked Chest and a time - confine Pyro torch puzzler . Start by using a Geo Damage dealer or claymore user tobreak the bouldercircled in the image above . It will open up a elbow room hold one Pyro woolly mullein .
Then carry on with lighting upall four Pyro torchesin any order . If you give way to complete the mystifier within a few seconds , the boulder will respawn , and you call for to redo it until you succeed . Completing this teaser will unlock the Exquisite Chest for you to despoil .
Open the gate on the ceiling
Interact with theleverbehind the mechanism so that the switching is downward . Then turn back and interact with theleverbeside the arcuate entryway , alike so that the switch is downward . The locked gate on the roof will open up . Use thestairsto go up up and defeat the Hilichurls lie around .
Interact with the logic gate in the room and unlock it using the Sea - Salt Crusted Key from earlier . Once inside , interact with the vase with a glow spot toloot another Sea - Salt Crusted Key . It ’s currently unclear what this Quest Item will be used for .
Unlock Chest, mechanism, and gate
Next , you will ascertain another locked Chest puzzle in the same elbow room . To work out this , you need tobreak all seven vasesin the room ( including the one you looted the Key from ) in a few seconds . Doing so will unlock the Chest , mechanics , and the gate lead further into the ruin .
Capture 2 Starlight Coalescences
Enter the gate on the left wing to discover thefirstStarlight Coalescence . It ’s a floating star that you call for to follow into the succeeding way . As soon as you ’re done leading the first Starlight , question inside the scuttle marked in the paradigm above to incur thesecondStarlight Coalescence , which you also need to follow . Act fast — if you do n’t pass both stars fast enough , they will return to their original spot , and you need to try again .
Once both Starlight Coalescences are in the same room , the Chest and mechanism will unlock , and you may enamor both stars as well .
Secret chamber torch puzzle
Turn get out to determine an arched entree leading into a mystic chamber . As presently as you step in , the gate behind you will shut , snare you inside . First , useAnemoto get free of the purple debris . Then turn on Elemental Sight to line up thebreakable boulderand use a Geo Damage trader or claymore user to give way it , divulge a room with one Pyro blowtorch .
There are four Pyro torches in total . assume that thegate is in front of you , light the torch fromright to left(the leftmost being the Aaron’s rod inside the small room ) . You must follow this exact gild to solve the teaser .
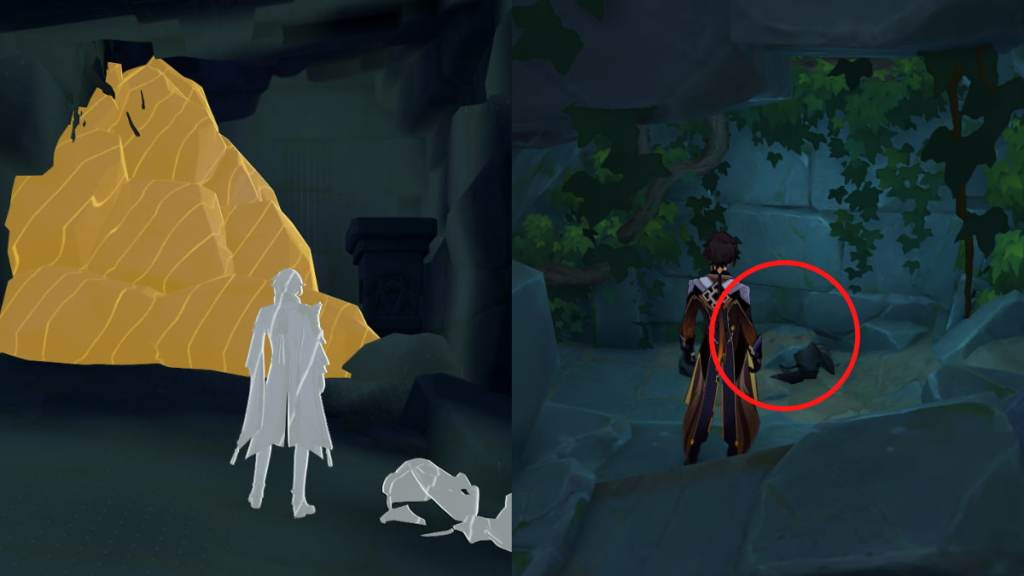
After solving the puzzler , two glow Investigate spots will appear . You must interact with the oneoutside , circled in the image above . Ignore the one inside the room !
Check Wolfgang’s notes
On the new island , interact with theetchingson the pillar . Once that ’s done , utilise the Waverider to return to the west islet , thenPlace in Waterto return to the past Minacious Isle .
Check out our guide onAll Chest locations in the Golden Apple Archipelago – Genshin Impact Summertime Odyssey eventto find other limited - time Chests on the island .