These bosses mean business .
Unlike Turf War , Salmon Run is a cooperative biz mode in Splatoon 3 . You must exploit together withfriendsor unknown to take down the Salmonids and claimGolden Eggs . To do this , you must shoot down Salmonid bosses and bring the Golden Eggs to your handbasket . This may leave you enquire how to defeat all bosses in Splatoon 3 ’s Salmon Run .
How to beat all Salmonid bosses in Splatoon 3 – Salmon Run Boss Guides
There are 11 independent bosses in Splatoon 3 ’s Salmon Run and King Salmon who can appear in a surprise fourth unit of ammunition . Each boss call for different strategies and must be fought with caveat . Here are all bosses in Salmon Run in Splatoon 3 and how to vote down them .
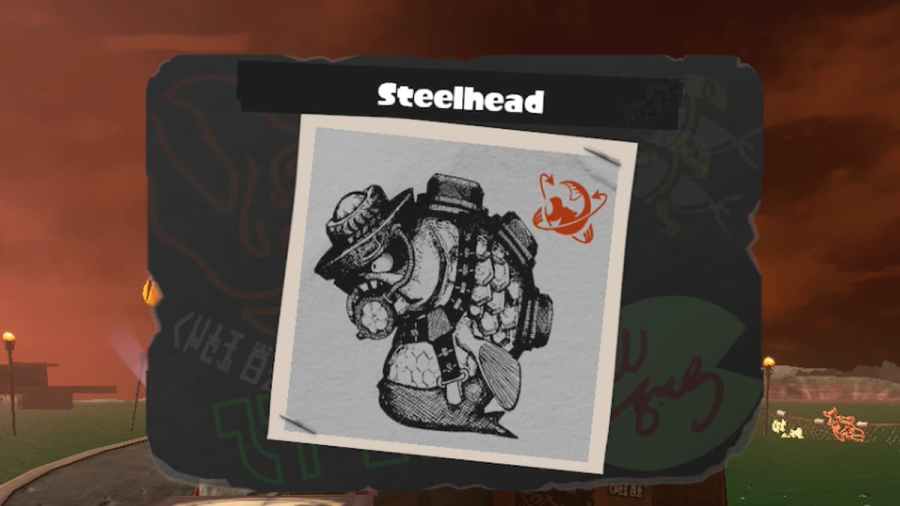
Steelhead
The Steelhead is a dim-witted Bos , but one that can be voiceless to deal with . hold back for it to come to a stop consonant and set forth charge its bomb . buck the bomb on top of its head word with everything you have . Otherwise , it will launch the dud , which cross a wide expanse with ink . If you do enough damage to its bomb , it will explode , destroying itself . The Charge Shot , in particular , is great against this boss .
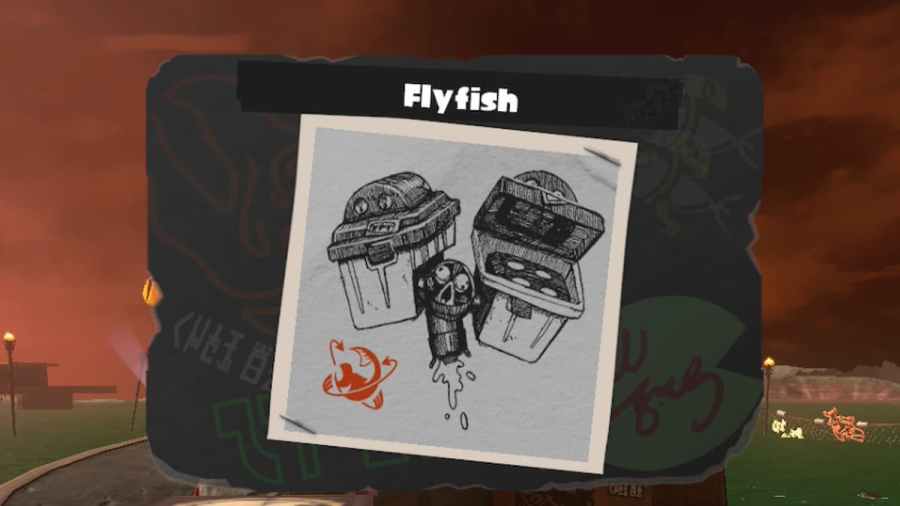
Flyfish
The Flyfish can be one of the more unmanageable boss to push simply because of the shop mechanic take to defeat it . You must wait for it to come to a halt and unfold its jetpacks . Once it does , toss a grenade into both to get it down . You need to line your grenade throws up just decently , or you put on the line missing or the grenade falling out . When it assault , it launches a barrage of missiles that will track you and your teammate . ward off these , as they can be devastating .
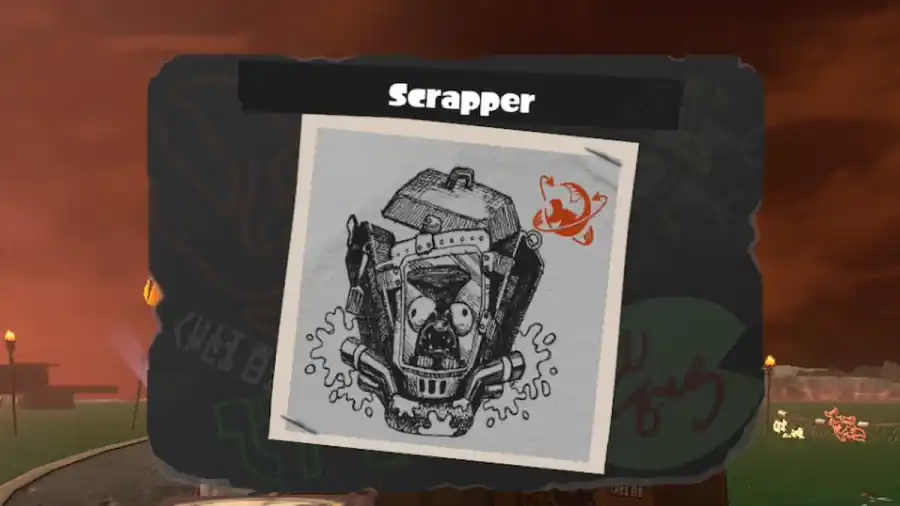
Scrapper
The Scrapper fag out heavy armor that protect it from most attacks . you may wear it down by continuously boom it . Once you do enough damage , it will stop and open its armor . Alternatively , you could sneak around behind it and attack the pilot film , avoiding the armor entirely . While the Scrapper may seem easy to stupefy , be careful when it is beleaguer by smaller Salmonids .
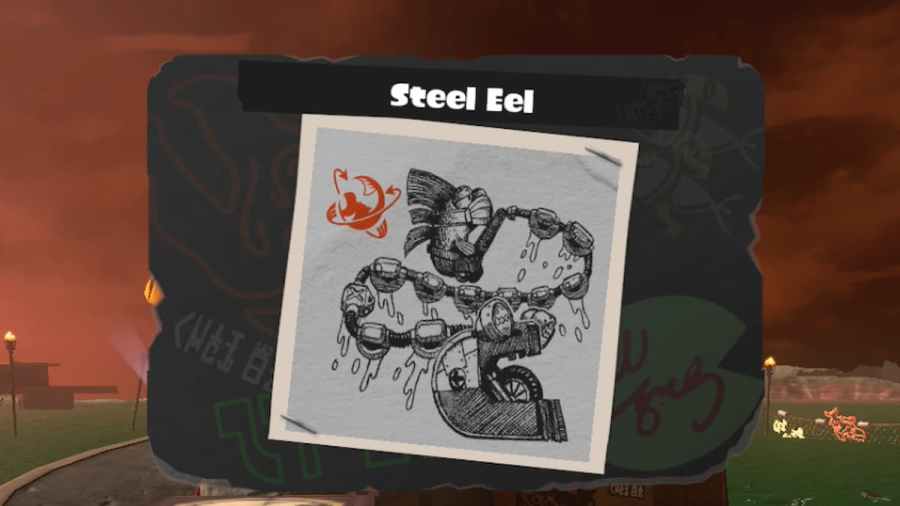
Steel Eel
Related : All food and booze detail in Splatoon 3
The Steel Eel can be a nuisance to fight as it is completely imperviable to hurt except for the pilot at the back . The Steel Eel will target and follow one player ; they should retreat and have their teammate get behind it . Blast the pilot with everything you have , and it should go down quickly . The Steel Eel can quickly stamp out you , so head off its ink and run away before you get immobilise .
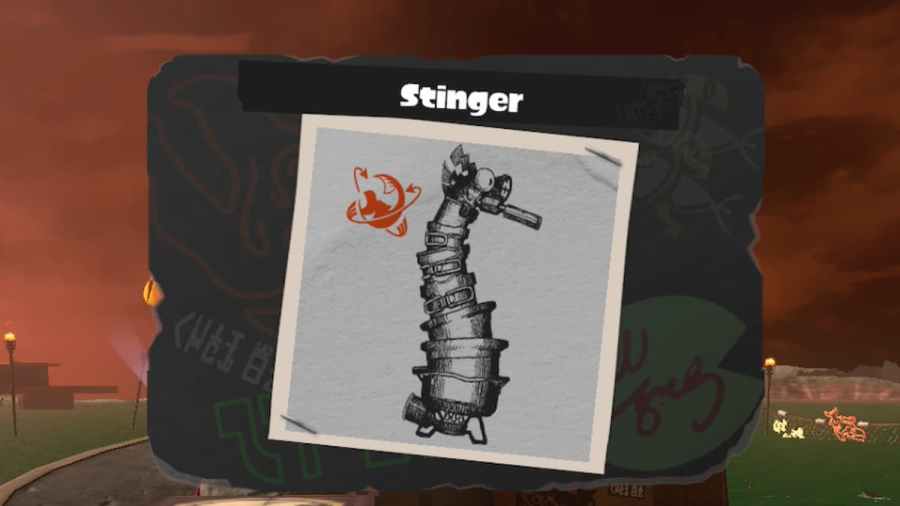
Stinger
The Stinger is especially pernicious because it murder you from across the mathematical function before you are mindful of its presence . If you do n’t straight off make out it , follow the lead of its fleeceable optical maser . When you bump it , attack the tummy that comprise its tower . Once you destroy each pot , it will fall to the ground and be kill .
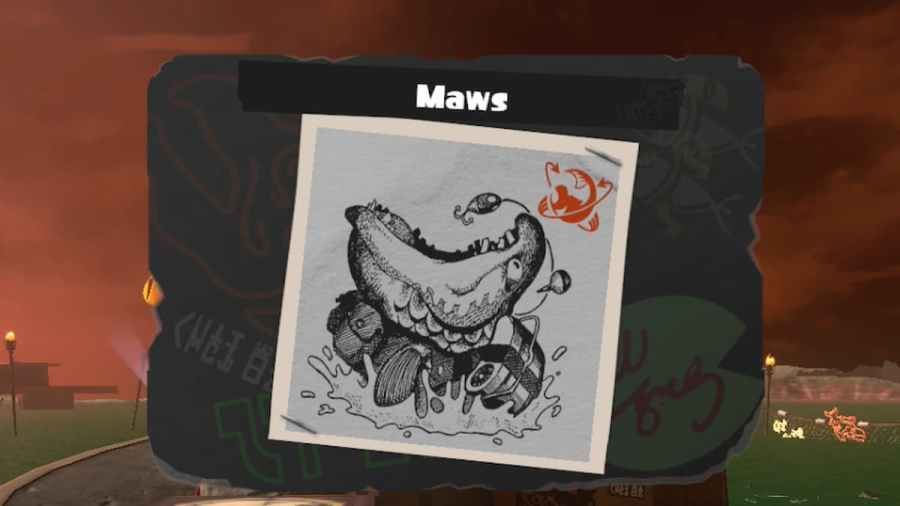
Maws
hole can be a wily boss to fight as it can go underground and appear where you least expect it . Watch for the flashing antenna on its head , as that give way its position out . When a gullible Mexican valium appears around the antenna , move around and drop a grenade in that spot . Maws will appear and swallow the grenade , dying instantly . If you lose the grenade placement , shoot it with everything you have before it submerse .
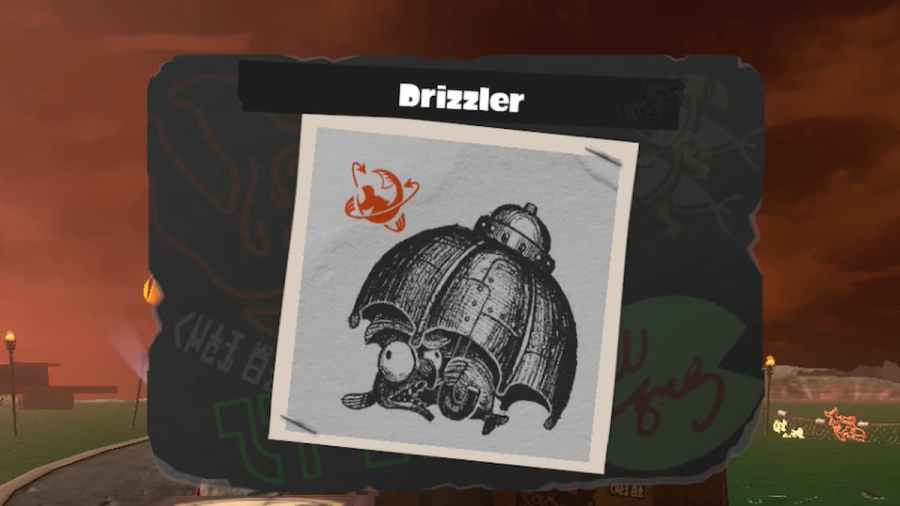
Drizzler
The Drizzler is an plaguy boss as it can hide under its umbrella and fervidness missiles across the map . Dodge the missiles and wait for it to emerge . Once it does , shell it with all your firepower to defeat it quickly before it can retrograde to safety . Watch out for it taking to the aura and relocating as well .
Related : How to exchange your Banner in Splatoon 3
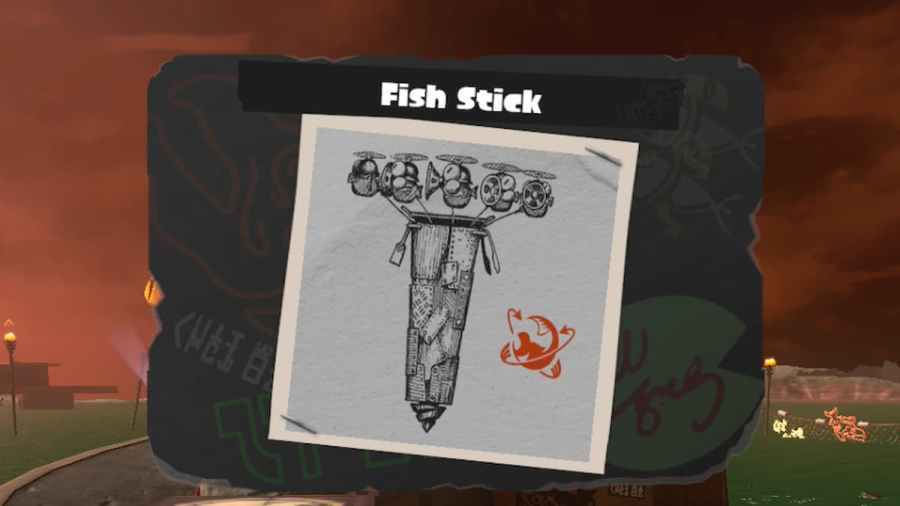
Fish Stick
The Fish Stick is an plaguy boss as you have to climb up its column once it land . Spray the spray with your ink and make your way to the top . Once there , blast the spinning Salmonids until they are all down . We recommend one player stay on top and throw the egg down to the other players .
Flipper-Flopper
The Flipper - Flopper is a comparatively easy boss . It telegraphs its motion by knock off down a ring of Salmon ink . It will then leap into the air and plunk into this ink . Cover the circle with your own ink , and the Flipper - Flopper will crash into the reason and be stun . Lay into it with everything you have to vote down it .
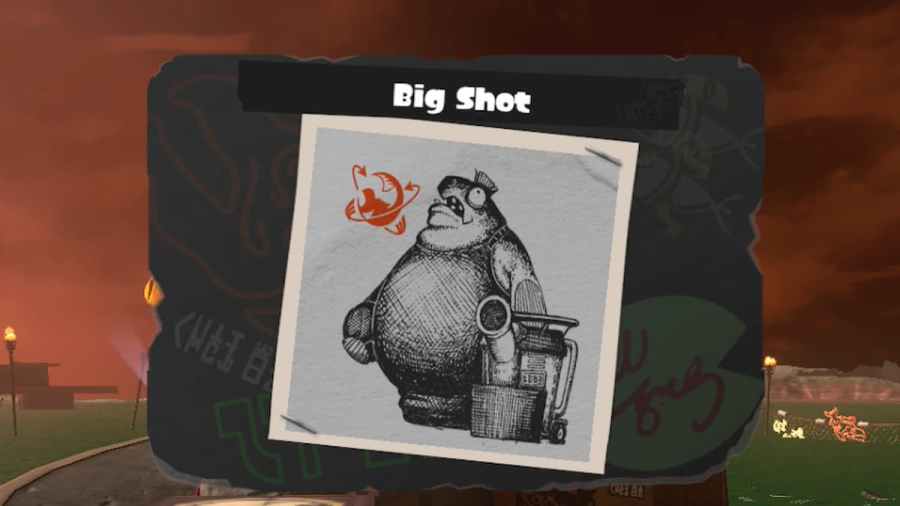
Big Shot
The Big Shot is something of a coward ; it will briefly come ashore and drop a shank . It will laden the cannon and then recede back to the sea . Defeat it before it can get away , or you will have to deal with an galling boss . you’re able to use its carom to found Golden Eggs back to your basket .
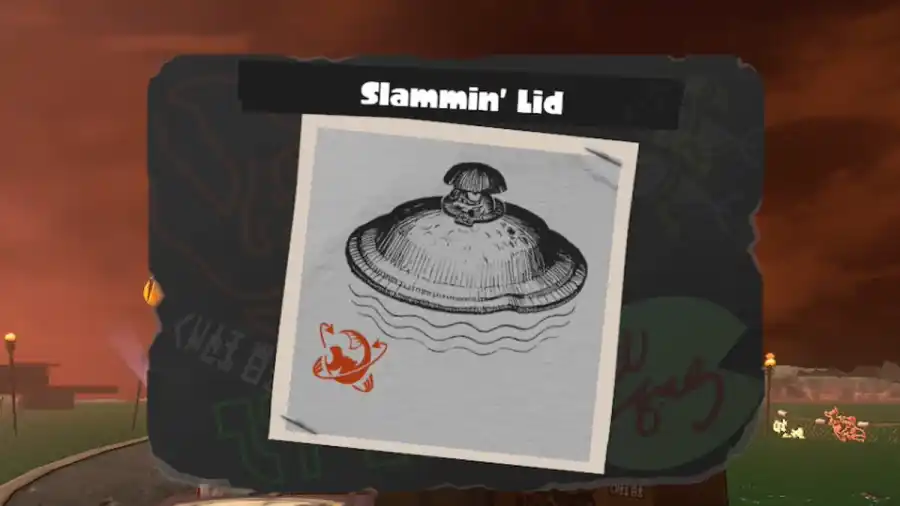
Slammin' Lid
The Slammer Lid can be very dangerous if you battle it around a swarm , as you have to trigger its barb . duck’s egg into its area of issue and quickly back out . Once it drops down , jump on top and bulge out blast its head . It does n’t have much health , so you should be able to down it quick . Just do n’t have the minions slow your hideaway , or you will get smash .
King Salmonid
This is the head honcho , king of the Salmonids . The King Salmonid only engender randomly in a surprise fourth round , but when it does , it means commercial enterprise . While the King Salmonid itself is not frightfully threatening , you are still push small and Bos Salmonids .
The King Salmoind will primarily throw itself in the melodic phrase and follow down with a shockwave . Avoid it and keep your distance . gust the King Salmonid to debilitate its health bar , but do n’t overleap the other enemies . These can well swarm you or crusade you into a bad spot properly when the King Salmonid comes down . To beat King Salmonid , you will require to divert your attention between attacking it directly and defeating the other Salmonids .
For more information on Splatoon 3 , check outSplatoon 3 – How to tailor-make your lockerandWhere to find Tableturf Battle in Splatoon 3on Pro Game Guides .